Showing posts with label old white. Show all posts

Wednesday, May 22, 2013

Cycling Coffee Table

Can you believe it's Memorial Day Weekend already?  Where does the time go?  It seems like it went from winter to summer in the blink of an eye.  I for one am happy to see the winter finally end. Bring on the Sunshine & long warm days!!!

A few months ago I seen the most awesome graphic from The Graphics Fairy.  Usually the piece of furniture gives me the inspiration for the graphic, but not this time. The graphic totally inspired the type of furniture, size & color choice.


How awesome is that!??

I found the perfect coffee table to show off this super awesome graphic.  I painted the base Paris Grey & the top in Old White.  Now the fun was about to begin.  I used my overhead projector to transfer the graphic:


Using my paint pens & a very steady hand, I carefully painted it on.  This took me three hours but I'd say it was well worth it.


I really had to focus when I got to the wheels.


I painted a black band on the edge....


Sprayed the hardware black, the clear waxed the whole thing.


Here it is in my booth.  I know it's not for everyone & it's kind of masculine, but to me, it's beautiful.  

Thursday, February 14, 2013

Another Clock Face Table

Happy Valentines Day to all you good people!  I hope you had a lovely day shared with your loved ones, I know I did.
A couple of weeks ago I picked up the most perfectly round coffee table. It was just what I was looking for to paint yet another clock faced table. If you follow me you already know this is my obsession.  I think it's actually bordering on a mental condition.  Every few months I just have to paint a clock face on something. I know, weird right?  On the positive side,  so far every item I've painted a clock face on has sold.

This was my inspiration:

It's the Heloise Wall Clock from Ballard Designs.  I love the colors & the style of the numbers. I normally do roman numerals, but I liked the big fat numbers on this clock. Here is the before picture of the table:

So perfect for this project! I sanded the whole thing really well as the top is Formica. After giving it a good cleaning, I gave it two coats of Paris Grey on the bottom & Old White on the top. After that was good & dry, I did a Duck Egg Blue wash over the Paris Grey.  I just finished another piece using this same application, you can read about it here.

Now I have a blank canvas.
I created the images on my computer in Publisher. I changed the letters & numbers to my own liking. Then I laid them all out & spaced them accordingly. To transfer the images I just turned the image over & scribbled with a pencil on the backside, then turned it over right side up & traced over the image.  Then I painted it in with a paint pen.


Here it is all painted in, sanded, distressed & waxed.


A close up of the cool details.


Available at Sassy Fabrics in Grand Blanc, MI


I added a nice little stencil to the outside edge.


Love these legs with the little black metal tips......


My version of Ballard's Heloise wall clock. 

What is so fun about painting clock faces (for me anyway)is you can add any detail you choose. These letters & numbers have significant meaning to me. There are so many things you can do when painting a clock face. You can do just the 12, 3, 6 & 9, or you could give it a really different background. You could even create a work of art with the clock face floating on a smaller scale off to the side. The possibilities are endless. 

Well, I hope I have inspired you to try painting a clock face on your next project.  If you have an epic fail, you can just paint over it. It's just paint after all.  Leave me a comment, I love to hear from you.  
Thank you for stopping by & have a great weekend! Dee


Friday, February 8, 2013

It's a Wash

Hello everyone, I hope you all have had a wonderful week. I have had two little boys home with the stomach bug most of the week. So, needless to say I didn't accomplish very much this week. To top off the perfect week, today is a snow day. Luckily, I have a few projects going that I can work on to pass the time on this snowy day.
 
Last week the hubby & I went shopping for some inventory. This is one of the best things about what we do, you get to go shopping. I found this cute little side table at the Goodwill.
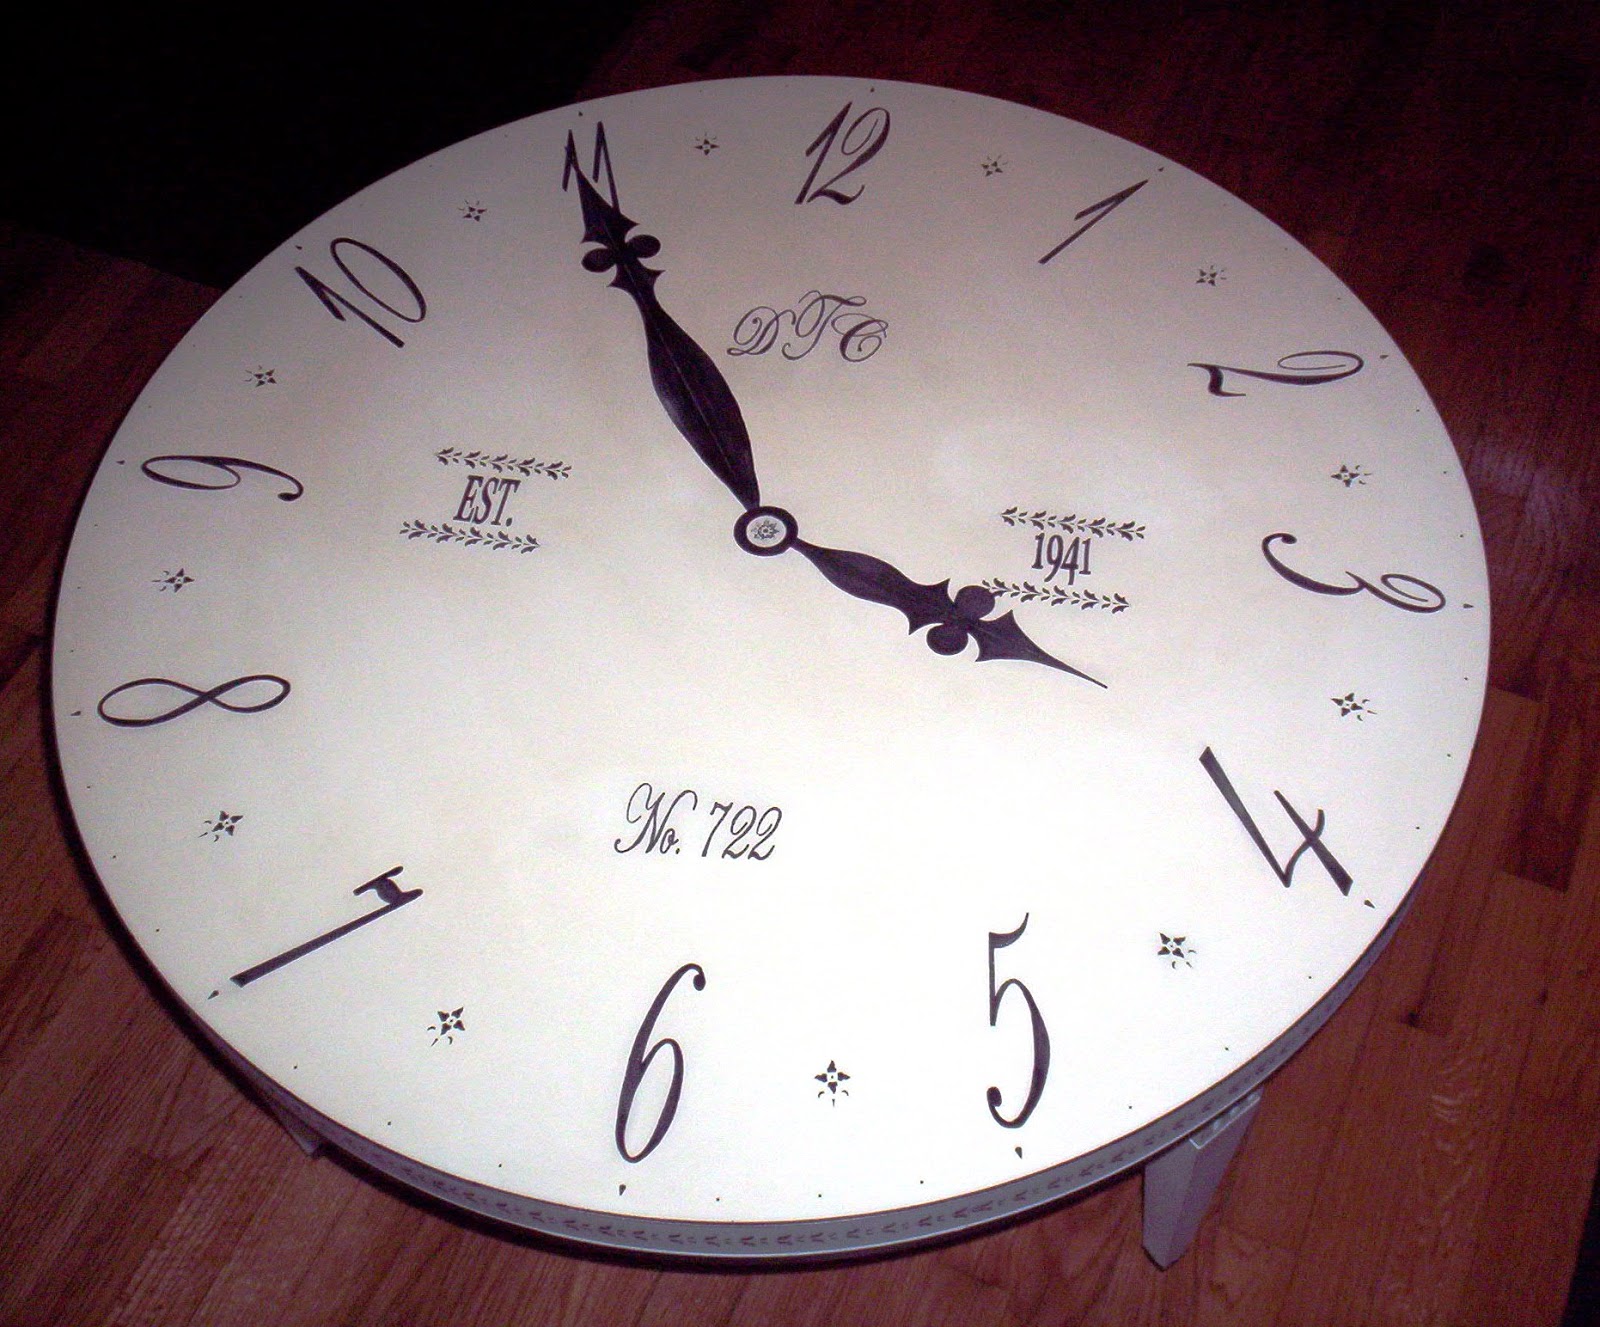
I love the size of this table. It's perfect for a bedside table or a small end table. I have painted this style table before, so I was excited to get started on this one. I had a plan.
 
 After getting it all sanded & cleaned up, I gave it a coat of Paris Grey. 


After that dried, I gave it a Duck Egg Blue Wash. I have used this method before in my Faux Finish days. It's a great way to give a subtle change to the base coat. You can see how it brightened up the grey. It's super easy, you just water down the paint you want for the "wash" & paint it on. It will be kind of runny so just go slow. I brush it on, then use a softening brush to blend it. Or you could do a Cross Hatch stroke to create some movement. Both look cool.

 After the wash was dry, I painted the top & drawer front Old White.

Then I went to my favorite place for graphics, The Graphics Fairy . I thought this graphic suited this little table perfectly. With the help of my trusty overhead projector, I had this graphic painted on there in no time.
When I sanded/distressed, the layers of color added a very cool dimension. Doing the "wash" is a great way to give you that layered look without having to use a lot of paint. Here are some more pictures....

 I also painted the knobs black & waxed the whole thing in clear wax.

 So, So Cute!

And here it is in my booth at Collette's Vintage & Antique Mall in Burton, MI.

Well I hope you all have a fabulous weekend. I know we will be digging out, once this snow stops, before we can enjoy our weekend. Thanks for stopping by, don't be shy, leave me a comment. I love to hear from you. Dee

Friday, January 11, 2013

The Most Amazing Roadside Rescue

On a beautiful day this past fall, my Mom & I were on our way back from a delivery to Sassy Fabrics, when we spotted the most amazing chair just sitting there on the curb in the middle of someones yard.  It was obviously set out to the road.  My Mom & I spotted it at the same time & immediately whipped the truck around & gunned it. There was another woman slowing down in her car who had just past this "most amazing chair", & she was putting it in park & walking towards it. Needless to say, I beat her to it. Sometimes you just want it more then the next guy. Here is a before picture of this "most amazing chair":
Poor baby right after surgery..

You could tell that someone was just driving to fast & lost this chair out of the back of their truck. Can you imagine their surprise when they realized they had lost this beautiful chair? I assume a very nice person picked it up off the road & placed it in the yard (near the curb) of the house we found it sitting. Thank you kind stranger, you totally made our day!

Once we got her home I assessed the damage. Poor baby had road rash & some fine hair line cracks. Nothing we couldn't repair.  This chair is sooo heavy, but incredibly sturdy. After cleaning her up, sanding, gluing & patching we were ready for paint.

With all that great detail I wanted to do a light color that would really show it off.  We chose Old White. After a couple of coats, we gave it a coat of clear wax, then I used the dark wax in all the beautiful details. What a difference that made. Take a look!

Feathers or Fronds?
Beautiful chunky legs!
 I added a graphic to the cushion from The Graphics Fairy (my favorite graphic site ever!).  I used drop cloth fabric (also my favorite fabric for upholstery).


I love this extra large seat.

Available at Sassy Fabrics in Grand Blanc, MI
These pictures just don't do this Amazing Chair justice. It is so beautiful in person. I'm sure it will find a loving home very soon. So, that is my story about the "Most Amazing Roadside Rescue".

I wish you all Happy & Prosperous Rescues! Thanks for stopping by & Have a Great Weekend!! Dee

Monday, December 10, 2012

A Lesson Learned

Happy Holidays everyone!  I hope you are all in the holiday spirit, I know I will be in about two more days. I've been working on a never ending custom job & it is nearly finished. Then I'll get into the Holiday swing.

Early in the spring a family friend gave us a very dated dining set. It was a table, four chairs & a buffet. I already showed you the buffet, you can read about it hereThe table is big & heavy & the chairs have that cane back. Two of the chairs had big holes punched in the caning.  Here is a picture of one of the chairs:

It was going to be impossible to repair & to expensive to replace, so I went with plan B.  I'm getting ahead of myself here, we first painted them Old White to match the buffet & did a clear wax on them. Here is the only before picture I have of the table (base), unfortunately I had already put one coat on it before I remembered to take the picture.


Now the dilemma with the chairs. I remembered Miss Mustard Seed had upholstered a caned back chair & used her tutorial as my guide, you can read about it here.  We went to our local upholstery shop & got some great advice on cost effective material & some tricks of the trade. My Mom & I plan on taking an upholstery class after the holidays, my hubby said he'd like to take it too. It'd be nice to know exactly what we are doing when it comes to this upholstery stuff.  Anyway, we used drop cloth fabric on the chairs. I of course had to add a graphic to the seat.  I seen the perfect one at The Graphics Fairy & added it to all four chairs. Here is how they turned out.


Front


Back
Don't you just love that scrolly detail.....


Compliments of The Graphics Fairy!

 All four in their new look....


I love the contrast of the white Gimp against the tan fabric, it really gives it that finished look.


One last look at all that hard work, approximately 25,000 staples & 500 glue sticks later....

Sold

Finally a complete set. They look pretty good together, don't you think!? We learned alot from doing this project. First, Don't be afraid of the unknown, do your homework & it's not so intimidating. Second, Get advice when you need it, makes the job so much easier. Third, once you've finished your project the next one will seem so do-able.  I hope this gives you some inspiration to give your scary project a try.  I'd love to hear about it.

 Thanks for visiting & take time to enjoy the Holidays!! Dee

Friday, November 16, 2012

Repurposed window

Happy Friday everyone, I hope you all had a great week & are looking forward to an even better weekend. I know I am. We are having Deer Widows Ladies Night at Collette's Vintage & Antique Mall tomorrow where I have my booth.  I have been super busy getting all stocked up for this event.

A few weeks ago I found a couple of nice roadside treasures in my neighborhood. Four cabinet doors, two were all wood & two had glass panes. I decided to start with the glass doors first. Here is what I started with:


 After a good scrubbing & scraping, I gave it a coat of Black, followed by a coat of Old White. Then I did a wet sand (with a scrubby sponge) & rubbed on a couple of coats of clear wax. Now it was time to decide exactly what to do with this little treasure. There are a 101 things you can do with an old window, just look on Pinterest if you need some inspiration.

I knew I wanted to do one of those cool "Menu" boards, so I went to my favorite graphic site, Graphics Fairy. I printed it out in the Mirror image in the right size & taped it to the front side, turned it over & painted it in with a paint pen.

Graphic taped on the front side.


Here is a picture of the back side.

Then I painted in the Graphic with a paint pen. After the paint was completely dry I took it outside to do the next step.


Frosted Glass Spray Paint. I sprayed right over the graphic on the back side
 of the window.  I gave it four coats, just enough to give it that nice frosted look.  Give it a good 30 min. between coats.


Here it is after about two coats.


 You can see how opaque it gets the more coats you apply.


I let it dry overnight, then put the original knob back on. I love how you are able to see the wall color thru the Frosted glass. Now I have a very cool Dry Erase Board. All the artwork is on the back side so you are able to write on the front side & just wipe it clean.


I always wanted to use this graphic. I just love how it turned out.

Sold


I attached a Black Dry Erase Marker on the side with Velcro after I took this picture.  I have one more door just like this one, I think I'll try a different color on that one.

Here is another window I painted using the same Frosted paint.


Table is available at Collette's Antique Mall in Burton, MI

This window sold quickly, but I have another one at Sassy Fabrics (V Trading) in Grand Blanc, MI. Now I need to put some finishing touches on a couple of things for tomorrows sale. Wish me luck!

Have you done a cool window repurpose lately? I'd love to hear about it. Have a great weekend everyone & Have a Happy Thanksgiving!  Dee