Monday, April 1, 2013

My Booth Got A Facelift

Hi everyone! I hope you all had a beautiful Easter.

I have spent the last two weeks working on giving my booth at Collette's Vintage & Antique Mall a facelift.  I have needed to do this since I got new neighbors on my right & behind me. For those of you who have a booth you know what I'm talking about.

This is what my booth looked like when we started a year ago:


The mall had just opened & I was in desperate need of two walls, I was on a corner. A few days after I took this picture the space behind & on the right filled up & they had walls. 


Then I moved to the other side of the mall.

My neighbors behind me & on both sides all had walls, so I was good for along time. Within the last two months I lost two of my three walls. Something had to be done!


The hutch sold right after I took this picture, so I really had no defined space anymore.

After digging through the garage I came up with everything I needed to build some much needed walls for my booth. I had been hoarding a bunch of old doors. I also had some deck railing & tons of wood to make shelves out of. 

So I spent the last week and a half white washing everything. Not an easy feat in 30 degree temps. Here I am giving a section of the deck rail a coat of paint.


After getting everything mocked up, we were ready to set it up.

This is what we came up with.


This is the back wall.


The wall on the right.


The wall on the left.


I love the new shelves & the recycled vanity mirror frame we used to hang our booth sign from.


Now I'm ready for spring & ready to start with some new inventory. Come on warmer weather!!!

Be sure to check out us out on Facebook. Thank you for stopping by.  I hope you have a great day!  Dee


Thanks for the features ladies!

I have to take a minute to thank a couple of ladies for featuring "My Wedding Chairs" a couple of weeks ago.

First I need to thank Tammy at Homespun Happenings. She is always so sweet & hosts a nice linky party every weekend.

Next I'd like to thank Sharon at Elizabeth and Company. She always has a very diverse linky party. I like to check out the ladies who post the yummy recipes. Her party is every Tuesday.

Thank you Tammy & Sharon!

Friday, March 29, 2013

Mid Century Blue

Happy Spring Everyone!
Spring has finally sprung here in Michigan & I, for one, am very grateful. I have way to much work piling up to wait a second longer for warmer weather. 
Now, at least for the next couple of days, I can paint in the driveway & actually work on more than one project at a time.

A few weeks ago I painted a dresser for a very nice man. He had a Mid Century Modern dresser that had been in his family for quite awhile now. Several years ago he had it painted a Dark Green color in a very glossy finish. Now he was ready for a new look.

Here is what it looked like when I brought it home:

YIKES!  SUPER SHINY    


  Love the style, hate the color...

We decided on a nice Blue color that coordinated with the bedding in his bedroom.  I gave it a quick sand, with such a shiny finish I thought "Better safe then sorry".

Two coats of paint, a little distressing, two coats of wax, sprayed the hardware black...

TA DA!...


Wow!  What a difference paint can make.


He was super happy with the new look. 
 Now he's looking for the matching dresser so I can paint it Blue too.

Hope everyone has a beautiful & productive day! Thanks for visiting, Dee


Wednesday, March 13, 2013

My Wedding Chairs

I can't believe it's been a month since my last post. I know I've been busy lately, but really have nothing to show for it. When you live in the north during the middle of the winter, it's hard to get motivated to paint. Especially when I normally paint outside. Enough for my lame excuses. I have something super special to share with you today.
Sometime in January, I was primping my booth and spotted a pair of chairs I thought would be perfect for my upcoming upholstery class. I kept my eye on them & finally they were marked down to a honey of a price so I snatched them up. Here is a picture of the before:


I know, hideous right? But so much potential. I loved the shape. So this is what I started with & after the first class they were stripped of all that crushed velvet & lumpy padding.  I painted the wood in Old White & gave it a couple of coats of clear wax.


Distressed it here & there....

    
Love those details....


I used my favorite fabric, drop cloth, & added some graphics..


With the wedding season upon us, I thought how appropriate would these be. I created the script on my computer in Publisher, then transferred them to the inside back panels. After much measuring and adjusting, this is how they looked after three classes.


I added graphics to the back too!

Now came the challenging part. Up to now it was pretty easy, stapling, pulling, more stapling. But, now it was time to sew. I hate sewing. I am a terrible sewer (is that even a real word?). Give me a paint brush any day. My instructor Terry was so patient with me. I would sew a little bit, then have to rip it back out. The sewing machine I was on was so flipping darn fast, I was afraid I was going to sew right thru my thumb before I could stop & get it out of the way! Well it took me two classes to finish my first cushion box. When I started the second cushion I thought, this one should be much easier. Yeah Right.... the first thing I did was sew the top panel on wrong side up or inside out. Had to rip that one out & start over. That's a mistake I won't be making again. Huge waste of time. Here is my semi finished cushion box/cover. I apparently forgot to get a picture of a completed cover.

Blurrie camera phone picture.
 I decided to use white "Gimp" instead of welting or cording. I like the contrast of the white against the  drop cloth & the old white paint. I hot glued it all around to cover over the staples. Here is the final result of all my weeks of hard work:


I like this font for the style of these chairs.


For the crown images, I went over to my favorite site for graphics, The Graphics Fairy. This is the "MRS." crown.


And this is the "MR." crown.


Can't you just see a Bride sitting in this chair on her wedding day, posing for pictures with her "Mr."


What fun photo props these could be.

Available at Sassy Fabric's in Grand Blanc, MI.
Or maybe on either side of the fireplace in a cozy living room. I was hoping to find a small round table to put in between them. I wanted to paint "&" really big on the top. I guess it wasn't meant to be, that might have been to much anyway.

This has been my most ambitious upholstery project so far. Will I try it again? Probably yes. Practice makes perfect, at least that's what I've been told. I hope if you have been thinking about trying your hand at upholstery you'll be brave & give it a try. If I can do it so can you.  Thanks for stopping by. I would love for you to leave me a comment. Let me know how you like my "Wedding Chairs". Have a Great Day!  Dee

linking up to:


Thursday, February 14, 2013

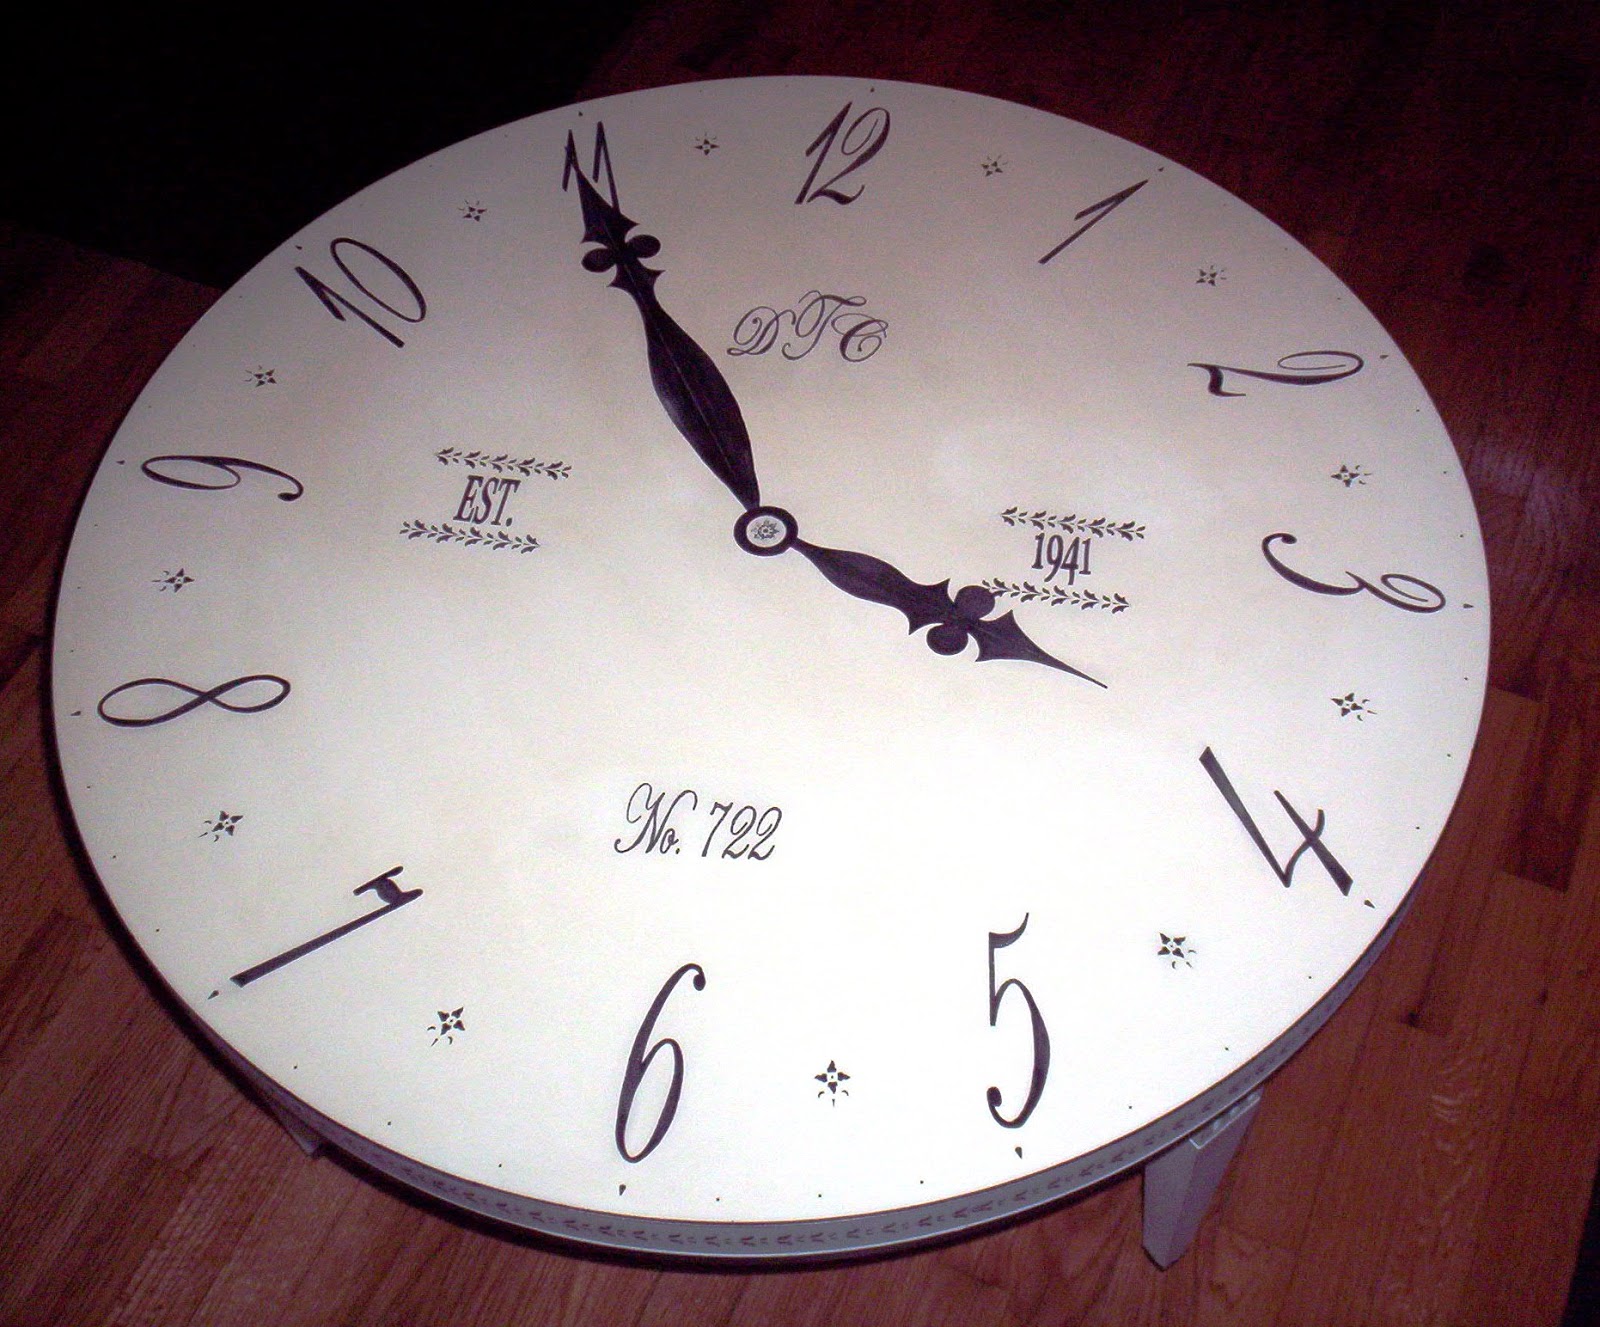
Another Clock Face Table

Happy Valentines Day to all you good people!  I hope you had a lovely day shared with your loved ones, I know I did.
A couple of weeks ago I picked up the most perfectly round coffee table. It was just what I was looking for to paint yet another clock faced table. If you follow me you already know this is my obsession.  I think it's actually bordering on a mental condition.  Every few months I just have to paint a clock face on something. I know, weird right?  On the positive side,  so far every item I've painted a clock face on has sold.

This was my inspiration:

It's the Heloise Wall Clock from Ballard Designs.  I love the colors & the style of the numbers. I normally do roman numerals, but I liked the big fat numbers on this clock. Here is the before picture of the table:

So perfect for this project! I sanded the whole thing really well as the top is Formica. After giving it a good cleaning, I gave it two coats of Paris Grey on the bottom & Old White on the top. After that was good & dry, I did a Duck Egg Blue wash over the Paris Grey.  I just finished another piece using this same application, you can read about it here.

Now I have a blank canvas.
I created the images on my computer in Publisher. I changed the letters & numbers to my own liking. Then I laid them all out & spaced them accordingly. To transfer the images I just turned the image over & scribbled with a pencil on the backside, then turned it over right side up & traced over the image.  Then I painted it in with a paint pen.


Here it is all painted in, sanded, distressed & waxed.


A close up of the cool details.


Available at Sassy Fabrics in Grand Blanc, MI


I added a nice little stencil to the outside edge.


Love these legs with the little black metal tips......


My version of Ballard's Heloise wall clock. 

What is so fun about painting clock faces (for me anyway)is you can add any detail you choose. These letters & numbers have significant meaning to me. There are so many things you can do when painting a clock face. You can do just the 12, 3, 6 & 9, or you could give it a really different background. You could even create a work of art with the clock face floating on a smaller scale off to the side. The possibilities are endless. 

Well, I hope I have inspired you to try painting a clock face on your next project.  If you have an epic fail, you can just paint over it. It's just paint after all.  Leave me a comment, I love to hear from you.  
Thank you for stopping by & have a great weekend! Dee


Friday, February 8, 2013

It's a Wash

Hello everyone, I hope you all have had a wonderful week. I have had two little boys home with the stomach bug most of the week. So, needless to say I didn't accomplish very much this week. To top off the perfect week, today is a snow day. Luckily, I have a few projects going that I can work on to pass the time on this snowy day.
 
Last week the hubby & I went shopping for some inventory. This is one of the best things about what we do, you get to go shopping. I found this cute little side table at the Goodwill.
I love the size of this table. It's perfect for a bedside table or a small end table. I have painted this style table before, so I was excited to get started on this one. I had a plan.
 
 After getting it all sanded & cleaned up, I gave it a coat of Paris Grey. 


After that dried, I gave it a Duck Egg Blue Wash. I have used this method before in my Faux Finish days. It's a great way to give a subtle change to the base coat. You can see how it brightened up the grey. It's super easy, you just water down the paint you want for the "wash" & paint it on. It will be kind of runny so just go slow. I brush it on, then use a softening brush to blend it. Or you could do a Cross Hatch stroke to create some movement. Both look cool.

 After the wash was dry, I painted the top & drawer front Old White.

Then I went to my favorite place for graphics, The Graphics Fairy . I thought this graphic suited this little table perfectly. With the help of my trusty overhead projector, I had this graphic painted on there in no time.
When I sanded/distressed, the layers of color added a very cool dimension. Doing the "wash" is a great way to give you that layered look without having to use a lot of paint. Here are some more pictures....

 I also painted the knobs black & waxed the whole thing in clear wax.

 So, So Cute!

And here it is in my booth at Collette's Vintage & Antique Mall in Burton, MI.

Well I hope you all have a fabulous weekend. I know we will be digging out, once this snow stops, before we can enjoy our weekend. Thanks for stopping by, don't be shy, leave me a comment. I love to hear from you. Dee