Monday, December 10, 2012

A Lesson Learned

Happy Holidays everyone!  I hope you are all in the holiday spirit, I know I will be in about two more days. I've been working on a never ending custom job & it is nearly finished. Then I'll get into the Holiday swing.

Early in the spring a family friend gave us a very dated dining set. It was a table, four chairs & a buffet. I already showed you the buffet, you can read about it hereThe table is big & heavy & the chairs have that cane back. Two of the chairs had big holes punched in the caning.  Here is a picture of one of the chairs:

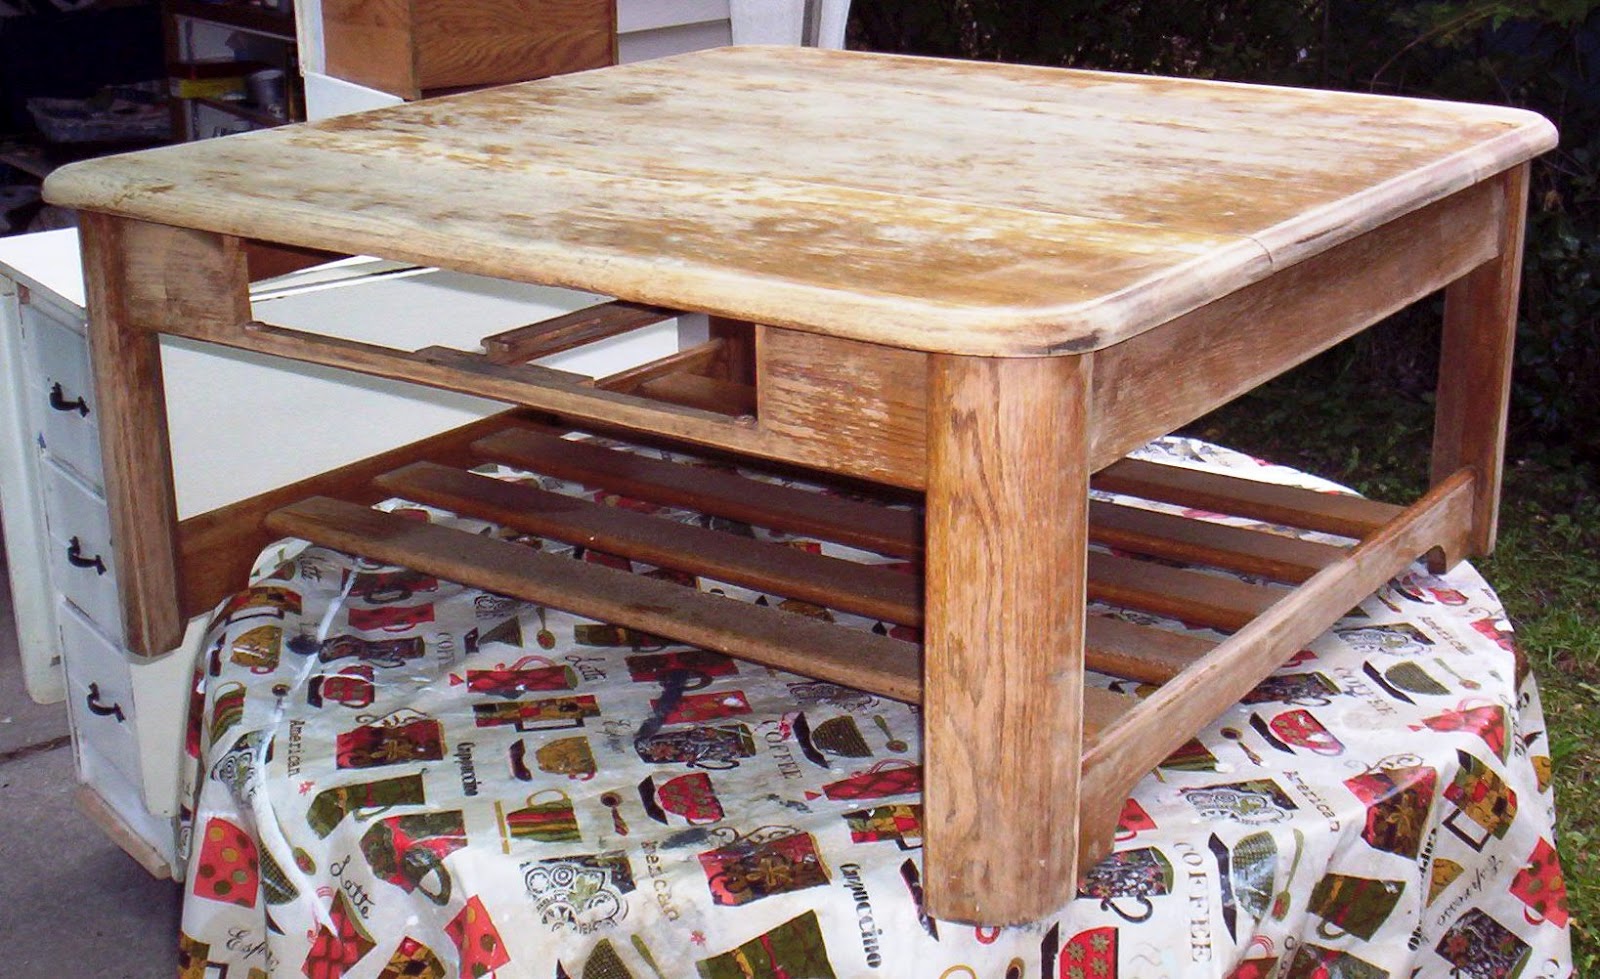
It was going to be impossible to repair & to expensive to replace, so I went with plan B.  I'm getting ahead of myself here, we first painted them Old White to match the buffet & did a clear wax on them. Here is the only before picture I have of the table (base), unfortunately I had already put one coat on it before I remembered to take the picture.


Now the dilemma with the chairs. I remembered Miss Mustard Seed had upholstered a caned back chair & used her tutorial as my guide, you can read about it here.  We went to our local upholstery shop & got some great advice on cost effective material & some tricks of the trade. My Mom & I plan on taking an upholstery class after the holidays, my hubby said he'd like to take it too. It'd be nice to know exactly what we are doing when it comes to this upholstery stuff.  Anyway, we used drop cloth fabric on the chairs. I of course had to add a graphic to the seat.  I seen the perfect one at The Graphics Fairy & added it to all four chairs. Here is how they turned out.


Front


Back
Don't you just love that scrolly detail.....


Compliments of The Graphics Fairy!

 All four in their new look....


I love the contrast of the white Gimp against the tan fabric, it really gives it that finished look.


One last look at all that hard work, approximately 25,000 staples & 500 glue sticks later....

Sold

Finally a complete set. They look pretty good together, don't you think!? We learned alot from doing this project. First, Don't be afraid of the unknown, do your homework & it's not so intimidating. Second, Get advice when you need it, makes the job so much easier. Third, once you've finished your project the next one will seem so do-able.  I hope this gives you some inspiration to give your scary project a try.  I'd love to hear about it.

 Thanks for visiting & take time to enjoy the Holidays!! Dee

Saturday, December 1, 2012

An Eventful Week

Hello everyone! I hope you all have recovered nicely from your long holiday weekend & are settling in for a busy Christmas Season. I know I am.

This week started out pretty eventful. On Sunday morning I'm sitting at my computer surfing thru the linky parties, enjoying my morning cup of coffee while my husband is in the living room watching the "CBS Sunday Morning" program. All of a sudden he starts shouting "That's your bench!  Dee your bench is on T.V.!!, Kid Rock has your bench!". I'm totally confused. I get up & go into the living room to see what he's yelling about & can't believe my eyes.  There's Kid Rock being interviewed in the Living Room of his home & over his shoulder in the background is my Flag bench.


 I'm freaking out! My mind in saying "It has to be my bench, no one is going to duplicate it & off center the back like mine was when it was built. If they were going to duplicate it they would have corrected that." So I pull up my pictures of this bench & compare them to what I see on the T.V. & they look exactly the same!  A couple of days later I make a delivery to Sassy Fabrics in Grand Blanc, where this bench was sold & I ask Karen (who sold it) if she seen this program? She says no, but that is your bench. It was confirmed! She sold it to Kid Rocks interior designer. She explained that celebrates were very private & she couldn't tell me who bought it when it sold. Woo Hoo!!  You see this bench at the top of my blog.

 So I am already on cloud nine when on Monday I check out The Graphics Fairy & there, being featured, is my "Menu" Dry Erase Board I posted about a couple of weeks ago.  I made it out of a Cabinet door, you can read about it here.  Everyone really seemed to love it because it was featured not one, not two but THREE times!! How awesome is that!? So I have some serious Thanking to do.

First, let me thank Karen at  The Graphics Fairy. She shares the most amazing graphics with us everyday. This is my go to graphic source.      
  
Secondly, let me thank Claire at The Rustic PigShe has done some beautiful windows herself. 

And Thirdly, let me thank Karen at Redoux. She does some awesome re purposed pieces.

I think that makes for a very Eventful Week don'tcha think? I hope you all have a pleasant weekend & thanks for stopping by.  Dee

Friday, November 16, 2012

Repurposed window

Happy Friday everyone, I hope you all had a great week & are looking forward to an even better weekend. I know I am. We are having Deer Widows Ladies Night at Collette's Vintage & Antique Mall tomorrow where I have my booth.  I have been super busy getting all stocked up for this event.

A few weeks ago I found a couple of nice roadside treasures in my neighborhood. Four cabinet doors, two were all wood & two had glass panes. I decided to start with the glass doors first. Here is what I started with:


 After a good scrubbing & scraping, I gave it a coat of Black, followed by a coat of Old White. Then I did a wet sand (with a scrubby sponge) & rubbed on a couple of coats of clear wax. Now it was time to decide exactly what to do with this little treasure. There are a 101 things you can do with an old window, just look on Pinterest if you need some inspiration.

I knew I wanted to do one of those cool "Menu" boards, so I went to my favorite graphic site, Graphics Fairy. I printed it out in the Mirror image in the right size & taped it to the front side, turned it over & painted it in with a paint pen.

Graphic taped on the front side.


Here is a picture of the back side.

Then I painted in the Graphic with a paint pen. After the paint was completely dry I took it outside to do the next step.


Frosted Glass Spray Paint. I sprayed right over the graphic on the back side
 of the window.  I gave it four coats, just enough to give it that nice frosted look.  Give it a good 30 min. between coats.


Here it is after about two coats.


 You can see how opaque it gets the more coats you apply.


I let it dry overnight, then put the original knob back on. I love how you are able to see the wall color thru the Frosted glass. Now I have a very cool Dry Erase Board. All the artwork is on the back side so you are able to write on the front side & just wipe it clean.


I always wanted to use this graphic. I just love how it turned out.

Sold


I attached a Black Dry Erase Marker on the side with Velcro after I took this picture.  I have one more door just like this one, I think I'll try a different color on that one.

Here is another window I painted using the same Frosted paint.


Table is available at Collette's Antique Mall in Burton, MI

This window sold quickly, but I have another one at Sassy Fabrics (V Trading) in Grand Blanc, MI. Now I need to put some finishing touches on a couple of things for tomorrows sale. Wish me luck!

Have you done a cool window repurpose lately? I'd love to hear about it. Have a great weekend everyone & Have a Happy Thanksgiving!  Dee


Tuesday, October 30, 2012

One Ugly Buffet

In the last week we have had Summer, Fall & Winter here in Michigan. Just last Monday my Mom & I were painting in my driveway in beautiful Sunny 75 degree weather. Now as I look out my window at my driveway all I see is a windy rain/sleet/snow mix kind of day. Yuck! That's Michigan weather for you. I guess I'll have to go back to painting in the basement.

Early in the spring this year a family member gave us a Dining table, four chairs & one ugly buffet. Thanks Scott & Rhonda! They were elated to find someone to take it off their hands. This is not the most attractive dining set on the planet.  It's from the early 80's, maybe even the mid 70's. It's that very heavy, chunky real ornate style. This always looks better painted. We started with the buffet. Here is a before picture:


This is my Mom giving it a good cleaning. This buffet has a "Marble" like stone top that was very scratched & dull. Just look at those enormous handles. What were they thinking? They look big enough to open a twelve foot door! They are almost Gothic looking. We removed them & filled the holes, I figured anything I replaced them with would have to look better then this.

After a good cleaning we gave it two coats of Old White & two coats of clear wax. I wanted to brighten/lighten up this heavy look. Once the painting & waxing was done we had some primping still to do on this piece.  The top was scrubbed & polished clean. We went to Hobby Lobby & found the perfect knobs to replace the old Gothic ones.  Here is the after picture:


Available at Sassy Fabrics (V Trading) in Grand Blanc, MI

So much better! We distressed it to enhance all the detail. Here is a shot of the "Marble" top:


The inside got alittle attention too.


We decoupaged the inside of the drawer & the shelf...


This has become my go to alternative to contact paper. I love how it looks. It's a graphic of a Vintage French script from The Graphics Fairy. I printed it on stock paper & cut it to the size I needed. I've used it recently here on a desk we finished last month....


and on a mirror/key holder organizer..


Available at Collette's Vintage & Antique Mall in Burton, MI

This one I added some other graphics on top of the script. This is in our booth at Collette's Vintage & Antique Mall.

When I first seen this buffet I thought to myself "That is one ugly buffet". Now with a new paint job & hardware I think the buffet turned out beautiful. We also painted the table & chairs but I'll show you those later. The chairs need major upholstery work. 

I hope you enjoyed your visit. I love to read your comments. Have a Happy & Safe Halloween.  Dee


Monday, October 22, 2012

His or Her Desk & A Thank You

I know it's been awhile since I've posted anything, I guess I needed a little break. But now I'm back in the swing of things.  Last month I went to an Antique Festival in Midland & found a very unique desk.  When I walked into this tent I spotted this desk from the backside & I could only see a corner of it, but I could see that it was different. So I walked around to the front of it & fell in love. It has such unusual lines.


I am so proud of myself, I actually remembered to get a before picture (even though I had already started painting it). You can see how the front curves in, even at the bottom. The style is both masculine & feminine. I decided to try & paint it neutral so it would appeal to both. 

After a good sanding & cleaning, I started with Paris Grey on the top & body.  The details got a coat of Old White & the recessed areas are painted black. Now it was time for a graphic. I went to my favorite place for graphics The Graphics Fairy. This is what I went with:


I love that the subject is masculine yet the script is feminine.


Did I mention this desk came with a chair? Well it did & here is a picture of what I did with it. I painted it Old White & put a graphic, I found at Etsy, on the cushion.


I used the original hardware & one of the best things about this desk is there are casters under it so you can just roll it to wherever you need to.


Here's a nice shot of the sexy curve....


I even decoupaged the inside of the top two drawers.


Available at Sassy Fabrics (V Trading) in Grand Blanc, MI.

I love how they look together. The perfect His or Her desk!

Now I would like to take a minute to say Thank You to Beckie at Roadkill Rescue. She featured my coffee table I found on the side of the road last month. You can read about it here. I just love this site. You can submit your roadside/repurposed treasures & if she likes it you'll be featured. I love the inspiration you get when you see what other people create. There are so many talented people on that site! If you've never heard of it, please check it out. You will be addicted just like I am. Thanks Beckie!!!

My mom & I are back to work again, so I should have plenty to write about in the very near future. As always, I love to read your comments. Thanks for stopping by & have a great day! Dee


Thursday, September 20, 2012

So Much Potential

Hello everyone, I hope you are all happily exhausted from painting/crafting like I am right now. I am trying to get some autumn smalls done for my booth. I think they take as much time as a full size piece of furniture. Plus I am flying solo for a little while. Although the hubby did take pity on me  help me out & painted a chair for me & waxed a few pieces ,as I was getting to grumpy to "Keep Calm & Carry On!".

A couple of weeks ago we were returning home from our weekly delivery & stumbled upon a roadside treasure. I don't know about you, but when my Mom & I travel we never take the same route there as we do home.  You never know what kind of treasures are waiting to be saved on the ride home. This particular day we found a few treasures.  Here is one of them:


It is big & solid wood which mean it's heavy. I loved the big top on it. It just had so much potential. I knew once I had it painted, I would have a nice large space for a very cool graphic. We painted it Old White, now I had a blank canvas.


I went to my favorite site for graphics, The Graphics Fairy. I have used this  graphic a few times on cushion covers for chairs. I love vintage wine graphics (maybe because I love wine) & this time I wanted to give it a punch of color.   Here is the graphic:

Before wax. 
 
Close up of the grapes.

 Using my overhead projector, I painted in the words & the outline of the grapes first with a black paint pen. I wanted the grapes to look like a watercolor painting so I took my time painting them in. I have painted grapes several times before, so this was like riding a bike. It felt good to do some actual artistic work again.

I used Paris Grey for the "Specialite" & craft paint for the grapes. After getting the graphic painted on, I applied a coat of ASCP clear wax, then I did a generous coat of dark wax. I just love the way the dark wax added so much depth.  It just adds the vintage look I was going for.

 
After wax.

Here is a picture of the whole table. 


I just love the way this one came out.  It has that cottage shabby chic look with a french twist.  


Available at Sassy Fabrics in Grand Blanc, MI


So functional with the large drawer & the storage underneath.  Perfect for a large family room or a Great Room.  Can you believe what people throw out?  I'm amazed every week. 

Have you had any roadside treasures lately, I'd love to hear about it. Thanks for visiting & have a great weekend!  Dee


Thursday, September 6, 2012

Shabby French Hutch

I hope everyone is back to school & settling into the routine.  I for one am ready for the nice long morning/afternoon of freedom......
Sorry, just savoring the moment.  Here's what we've been up to:

About the middle of the summer, my Mom came across the best garage sale. I know you all can relate. The one where you see nothing but furniture with great potential at great prices. This was her score that day:


It had the worst paint job. This dark brown paint was a shiny drippy mess. I took my sander to it & showed no mercy!  After sanding off all the drips, it was time to talk about color.  This little hutch reminded me so much of the very first one I painted back in March, you can read about it here. This is what it looked like:


Sold
This one was Old White & Paris Grey. I love this combination, so crisp & clean looking. So this was my inspiration. This color combo is a great seller in my booth.  At the last minute we decided to go with Pure White instead. I know it's not a huge difference, but it is brighter looking & that's what I wanted. Here is what it looks like now:


Available at Sassy Fabrics (V Trading) in Grand Blanc, MI.

There are two drawers & one of them it slotted & lined in green felt for flatware. Behind the sliding doors is great storage with a shelf. I just love this Shabby Mid Century Modern Style. The new paint really gives this piece a whole new fresh look don't you think?

Here are a few more things we finished this past week:


Available at Sassy Fabrics.

The sweetest little High chair.  I wasn't very excited when I first seen this, but after it was painted I was thrilled!

Also at Sassy Fabrics (V Trading) in Grand Blanc, MI

And a pair of Oak pressed back chairs. These look so pretty in Shabby White.....

Well, that's it for now. If you live in my area & are thinking about having some furniture painted, email me a picture & I'll get back to you. We love doing custom work.

Hope you all have a fantastic weekend. Thanks for stopping by, Dee


Wednesday, August 29, 2012

Shabby Dressing Table

It's been crazy busy around here this week. I've been getting the kids ready for back to school & maintaining our painting routine. Wish I could squeeze a few more hours into a day. Better yet, I wish I could clone myself, then I would at least get the laundry & housework done along with the painting.

Enough of my whining....

As I mentioned in my last post, we are introducing some new warmer colors into our palette.  This week we worked with Old Ochre & Coco. I just love this color combination!  We have been on this vanity/dressing table phase lately. A couple of weeks ago I found a buffet on Craig's List, when we went to look at it we decided to pass due to the poor condition. The lady also had a vanity for sale & that's what we came home with. Of course I do not have a before picture. I am really trying to do better about that...

Anyway, the paint on the whole piece was cracked & chipping off. We decided to just strip the top & see if it was in good enough condition to stain. So after lots of sanding & two coats of Dark Walnut stain, this is what it looks like:


I love this look.  I gave the top several coats of Minwax Wipe On Poly. Love this product by the way, so easy to use. Then we painted the body Old Ochre with the highlights in Coco. The hardware & detail on the front is in Modern Masters English Brown Metallic Paint.


We sanded & distressed then gave it a coat each of clear & dark waxes.

Did I mention there is a chair that goes with this beautiful Dressing table?


Front & Back 


Here is a close up of the fancy seat cushion:


Here is the finished set:


Sigh..........

I feel like we need to call this a "Dressing Table" & NOT a 'Vanity" because it is so elegant looking. There is the original mirror on the inside. The lady we bought this from said she remembers when her grandmother bought this, so she is guessing it was at least 45 years old. The pictures just don't do these pieces justice. 

Look for us to be doing more of these warm beautiful colors in the near future.  Are you giving some new colors a try? I'd love to hear about it.

If you are interested in this beautiful set it's for sale at Sassy Fabrics (V Trading) in Grand Blanc, MI.  If you live in my area & have an old piece of furniture that you want painted, shoot me an email & we can talk about it.

Have a great & safe Holiday weekend. Thanks for visiting,  Dee